Playstation 5 vs Xbox Series X: Unveiling the Battle of Titans

By Uncategorized No Comments
(Image Credit: Future)

In the ever-evolving landscape of gaming consoles, two titans have emerged to vie for the attention and loyalty of gamers worldwide: Sony’s PlayStation 5 and Microsoft’s Xbox Series X. Both consoles bring to the table a plethora of features and capabilities, catering to diverse gaming preferences. Let’s delve into the pros and cons of each, dissecting the essence of what makes these consoles unique.

PlayStation 5: Pushing Boundaries

Pros:

  1. Stunning Exclusive Titles: Sony’s strong suit has always been its exclusive game titles. With PS5, players are treated to a rich library of exclusive games like “Spider-Man: Miles Morales,” “Ratchet & Clank: Rift Apart,” and “Demon’s Souls,” promising immersive experiences found nowhere else.
  2. Innovative DualSense Controller: The PS5’s DualSense controller introduces haptic feedback and adaptive triggers, elevating the gaming experience by providing tactile sensations that match in-game actions, enhancing immersion.
  3. Ultra-High-Speed SSD: PS5 boasts an ultra-high-speed SSD that drastically reduces load times, ensuring seamless transitions between gameplay and enhancing open-world experiences.
  4. User-Friendly UI: The PS5 interface is intuitive and user-friendly, making it easy for players to navigate through games, media, and social features effortlessly.

Cons:

  1. Limited Backward Compatibility: While the PS5 does offer backward compatibility for most PS4 games, it lacks support for games from previous PlayStation consoles, limiting the nostalgia factor for longtime PlayStation fans.
  2. Scarce Availability: Due to high demand and supply chain issues, obtaining a PS5 has been challenging, leading to frustration for many potential buyers.

Xbox Series X: Powerhouse Performance

Pros:

  1. Xbox Game Pass: Microsoft’s Xbox Game Pass offers a vast library of games for a monthly subscription fee, providing excellent value for gamers who enjoy exploring a wide range of titles.
  2. Backward Compatibility: Xbox Series X supports backward compatibility for not only Xbox One but also select Xbox 360 and original Xbox games, allowing players to revisit classics from previous console generations.
  3. Quick Resume Feature: Xbox Series X’s Quick Resume feature enables players to switch between multiple games seamlessly, picking up right where they left off without lengthy load times.
  4. Game Pass Ultimate Benefits: Xbox Game Pass Ultimate includes Xbox Live Gold, granting access to online multiplayer, free monthly games, and exclusive member discounts.

Cons:

  1. Exclusive Titles Lag Behind: While Xbox Series X has promising exclusive titles in the pipeline, it currently lags behind the PS5 in terms of the number and diversity of exclusive games available.
  2. Larger Physical Size: The Xbox Series X is bulkier compared to the PS5, which might pose challenges for gamers with limited entertainment center space.

Conclusion: Choosing Your Gaming Destiny

In the battle of PS5 vs Xbox Series X, the choice ultimately boils down to personal preferences and priorities. If you value exclusive game titles, innovative controllers, and a user-friendly interface, the PS5 might be your ideal gaming companion. On the other hand, if you prioritize a vast game library, backward compatibility, and robust subscription services, the Xbox Series X could be the console that fulfills your gaming dreams. Whichever path you choose, both consoles promise a thrilling gaming experience, ushering in a new era of immersive gameplay and entertainment. Happy gaming!

How to Fix a Phone That Randomly Mutes During Calls | Owl Repairs

By Uncategorized No Comments

Written by Scott Vo

Technician cleaning a smartphone microphone port with precision tools to fix muting issues during calls at Owl Repairs.

Few things are more frustrating than your phone suddenly muting in the middle of a conversation. You might still hear the other person, but they can’t hear you—or vice versa. For most users, it feels random, but there’s always an underlying reason. Whether it’s a faulty mic, worn-out speaker mesh, outdated firmware, or a network glitch, ignoring this problem can lead to bigger hardware failures later.

At Owl Repairs, our technicians have seen every version of this issue—from phones that mute after a few minutes to devices that drop audio only when on speaker mode. This guide explains what’s happening, how you can diagnose it safely, and when to get a professional repair to protect your device’s long-term health.


Section 1: Understanding Why Phones Mute During Calls

Modern smartphones rely on delicate circuits and complex firmware layers to handle audio input and output. When any of these elements fails—even slightly—the phone may behave unpredictably.

1. Hardware vs. Software Root Causes

  • Hardware causes include microphone wear, speaker damage, flex-cable disconnection, or corrosion due to moisture.
  • Software causes include system updates, app conflicts, or buggy noise-cancellation algorithms.

Sometimes both overlap—like when a third-party app triggers an audio policy conflict that stresses the hardware amplifier.

2. Mic Placement and Dust Build-Up

The mic openings at the bottom and top of the phone are tiny. Even a thin layer of dust can block sound waves, causing audio dropouts. Use a flashlight to check the holes before assuming a deeper fault.

3. Network Signal and VoLTE Interference

Weak LTE or 5G coverage can disrupt voice packets during calls, making it seem like your phone muted. Switching to Wi-Fi calling can confirm whether the issue is signal-related.


Section 2: Common Scenarios When Audio Drops or Mic Fails

Understanding patterns helps narrow the diagnosis.

1. Mutes Only on Speakerphone

Likely a feedback-suppression bug or secondary-mic blockage. Many phones have separate top mics for noise cancellation; if blocked, the system misreads echo and mutes you automatically.

2. Mutes Only on Bluetooth Headset

This points to a pairing or codec issue. Remove all paired devices and reconnect. If Bluetooth still fails, you may need to reset network settings.

3. Mutes Randomly on Normal Calls

Usually firmware, SIM, or proximity-sensor related. When the screen turns off during calls, certain firmware builds mistakenly disable audio channels.

4. Mutes After Dropping the Phone

Physical shock may have loosened the mic’s flex cable or damaged the logic-board solder joint. This requires immediate professional repair. Visit Owl Repairs’ Instant Quote Widget to estimate the cost before scheduling service.


Section 3: DIY Checks Before You Book a Repair

1. Restart and Safe Mode Test

A quick restart clears temporary cache issues. If muting continues, boot into safe mode—this loads only system apps. If the mic works fine there, an installed app is the culprit.

2. Update Your Phone’s Software

Manufacturers often release silent patches for audio problems. Check for system updates and carrier-settings updates under Settings → General → About → Update (if available).

3. Clean Microphone and Speaker Grills

Use a soft, dry toothbrush or compressed air at a 45-degree angle. Avoid liquids. Moisture can worsen the problem and void your warranty.

4. Reset Network Settings

Navigate to Settings → General → Transfer or Reset → Reset Network Settings. This erases saved Wi-Fi, VPN, and Bluetooth profiles—perfect for fixing call-routing conflicts.

5. Test With Voice Recorder or Camera App

Record a 10-second voice memo. If playback is distorted or silent, the mic is physically failing.

If these steps don’t resolve the issue, it’s time for professional attention. Owl Repairs’ We Come to You Mobile Repair Service lets you get help right at your doorstep—no need to wait in line.


Section 4: When to Seek Professional Help

Persistent call-audio problems usually point to one of the following:

  • Mic Assembly Damage: The flex-board connecting mic circuits can break after a drop.
  • Logic-Board Fault: Often seen in iPhones after water exposure.
  • Firmware Corruption: May need a professional re-flash.
  • Speaker Amp Failure: Produces distortion and mute toggling.

At Owl Repairs, trained technicians run full diagnostics before opening the device. They test mics, earpieces, audio IC chips, and connectors to ensure the correct fix—saving you unnecessary part replacements.

Customers can also sell their device or buy a refurbished one if repair isn’t cost-effective.


Section 5: How Owl Repairs Fixes Call-Audio Issues

  1. Full Diagnostic Check: Verifies mic, earpiece, and logic-board communication.
  2. Component Cleaning & Replacement: Uses OEM-grade tools for precision.
  3. Software Restoration: Reloads firmware to clear corrupted audio modules.
  4. Post-Repair Testing: Ensures stable audio in normal, speaker, and Bluetooth modes.
  5. Warranty & After-Care: All repairs come with a lifetime warranty (excluding water/physical damage).

If visiting the store isn’t convenient, simply request a doorstep technician through Owl Repairs’ mobile service.


Section 6: Preventing Future Call-Audio Problems

  • Keep mic ports dust-free.
  • Use original accessories.
  • Avoid placing phones on moist surfaces.
  • Restart your phone weekly to clear cached processes.
  • Perform regular system updates.

Small steps help your device last longer and keep your voice clear during every call.


Section 7: Troubleshooting for Different Brands

iPhones

  • Toggle the “Change with Buttons” option under Sounds & Haptics.
  • Test mic using Voice Memos; if no sound, mic module likely damaged.
  • Back up and reset via Finder or iTunes.

Samsung & Android Phones

  • Disable Bixby Voice or Google Assistant voice activation—it sometimes hijacks the mic.
  • Run “Diagnostics” in the Samsung Members app.
  • Check app permissions under Settings → Privacy → Microphone.

Section 8: Why Ignoring Mute Issues Can Damage Hardware

Prolonged firmware bugs keep the audio amplifier active even when muted, increasing heat on the logic-board. Over months, this can degrade the solder joints around the Audio IC, leading to permanent failure. Timely repair not only restores sound but prevents expensive board-level damage.


Section 9: Summary & Final Thoughts

If your phone randomly mutes during calls, start simple—restart, clean, test, and update. When those fail, it’s a clear sign of deeper hardware stress. Rather than risking further damage, let experts handle it.

Get a free diagnostic quote through the Instant Quote Widget or contact our team today. Owl Repairs guarantees quick turnaround, genuine parts, and lifetime warranty support.


FAQs

Q1: Why does my phone mute only during long calls?
It could be a firmware bug or network timeout. Reset network settings and update OS.

Q2: Can water damage cause my mic to mute randomly?
Yes. Even minor moisture can corrode mic pins or audio IC connections, creating intermittent muting.

Q3: Is Bluetooth to blame for my muting problem?
If it happens only when connected to a headset, re-pair or update Bluetooth firmware.

Q4: How much does a mic repair cost at Owl Repairs?
Use the Instant Quote Widget for an exact estimate—pricing varies by model.

Q5: Does Owl Repairs offer mobile repair for audio issues?
Yes, our We Come to You service covers mic, speaker, and logic-board repairs at your location.

Disclaimer

This content is for informational purposes only. For accurate diagnosis and repair pricing, please visit a certified technician at Owl Repairs. Results may vary depending on device model and damage severity.

Why Your Phone’s Proximity Sensor Fails After a Repair: Causes & What to Check

By Uncategorized No Comments

Technician wearing black gloves carefully repairing a smartphone’s internal components on a blue work mat, using precision tools to inspect the proximity sensor area.

Written by Scott Vo

Your phone’s proximity sensor helps manage your screen during calls, preventing accidental touches and saving battery life. But after a repair—especially screen replacements or hardware servicing—it might stop working properly. If your phone’s display stays on during calls or turns off unexpectedly, it’s likely a sensor malfunction.

At Owl Repairs, our certified technicians handle thousands of similar repair cases every year. In this guide, we’ll explain why the proximity sensor fails post-repair, what you can check yourself, and how professionals ensure proper calibration for lasting performance.


Understanding the Role of the Proximity Sensor

The proximity sensor detects how close your face or hand is to the phone’s display. When you hold your phone to your ear during a call, the sensor disables the touchscreen to avoid unwanted taps. Once you move the phone away, it reactivates the display instantly.

Common symptoms of proximity sensor failure include:


      • Screen staying on during calls

      • Display not turning on after a call

      • Auto-brightness malfunction

      • Random screen shutoffs

      • Difficulty waking the phone

    If you’ve recently had your screen replaced, battery changed, or motherboard repaired, the issue may be linked to improper reassembly or sensor misalignment.


    Number 1: Causes of Proximity Sensor Failure After a Repair

    1. Misaligned or Blocked Sensor

    During screen or glass replacement, even a minor misalignment can block the sensor’s line of sight. If dust, adhesive, or protective glass covers the sensor area, it may stop detecting proximity altogether.

    Professional repair shops like Owl Repairs ensure that the sensor hole and gasket are perfectly aligned during reinstallation.

    2. Faulty Replacement Parts

    Cheaper third-party screens often use tinted or non-transparent sensor covers, interfering with the infrared signal. If your screen wasn’t OEM-quality, the sensor might read inaccurately or not at all.

    To prevent this, always choose high-quality parts or let our experts verify them during your next visit through the Instant Quote Widget.

    3. Damaged Flex Cable or Connector

    The proximity sensor connects to the motherboard via a thin flex cable. During repair, accidental pressure or static discharge can damage the connector. Even a slightly loose connection can cause intermittent failures or ghost triggers.

    4. Software Calibration Errors

    Some sensors need recalibration after hardware repair. Without software tuning, your phone may fail to detect changes in light or distance. Android and iPhone users alike can experience this after a screen swap or firmware update.

    5. Obstructive Screen Protectors or Cases

    Thick tempered glass protectors, dark coatings, or opaque cases can interfere with the sensor’s infrared beam. If you’ve recently added a new case or protector after a repair, try removing it temporarily to test functionality.


    Number 2: What You Can Check Before Visiting a Technician

    Step 1: Test Sensor Function

    Dial your phone’s diagnostic code (like #0# on some Androids) or use built-in sensor apps to check if it’s detecting proximity changes.

    If the reading remains unchanged, the problem is likely hardware-related.

    Step 2: Clean the Sensor Area

    Use a microfiber cloth to gently clean the top part of your display near the earpiece. Dust or adhesive residue from screen replacements can block the sensor window.

    Step 3: Check Display Settings

    Go to your phone’s settings and make sure “Proximity Sensor” or “Prevent accidental wake-up” options are enabled. On some devices, disabling them prevents the sensor from functioning properly.

    Step 4: Restart or Update Your Phone

    A simple reboot or pending software update can refresh the sensor drivers. If issues persist, a factory reset might help—but only after backing up your data. Use Owl Repairs’ data protection tips before attempting resets.

    Step 5: Seek Professional Diagnosis

    If you suspect a deeper issue, use the Instant Quote Widget to book a free inspection. Our technicians check alignment, connection integrity, and recalibration—often fixing the issue on the spot.


    Next: How Technicians at Owl Repairs Fix Proximity Sensor Issues

    At Owl Repairs, repair accuracy matters. Here’s how professionals handle post-repair proximity failures:


        1. Visual Inspection: Ensuring no dust, adhesive, or misalignment blocks the sensor lens.

        1. Hardware Testing: Using professional multimeters and diagnostic tools to confirm proper voltage and resistance levels.

        1. Connector Cleaning: Re-seating and cleaning the flex cable contacts.

        1. Firmware Recalibration: Adjusting software sensitivity and running proximity tests.

        1. Final Quality Assurance: Confirming that screen auto-off/on behavior functions correctly during calls.

      If your phone still doesn’t respond, our team can help replace or recalibrate the entire sensor assembly—ensuring it performs like new.

      You can also sell your device or buy a certified replacement through our official store if your repair is beyond cost-effective limits.


      Number 4: How to Prevent Future Proximity Sensor Issues


          • Always choose OEM-quality screens and parts.

          • Avoid cheap adhesive or tinted glass near the top sensor area.

          • Clean the earpiece section regularly.

          • Get professional help for battery or display replacements—never DIY.

          • Run diagnostic tests after every repair.

        If you prefer doorstep assistance, our We Come To You Mobile iPhone & Android Repair Service ensures expert handling at your location.


        Conclusion

        Proximity sensor failures are common but avoidable after repairs. In most cases, proper calibration, sensor alignment, and high-quality components solve the issue. Ignoring it can lead to overheating, accidental calls, and poor battery life.

        When you need expert help, contact Owl Repairs for a free diagnostic and quick turnaround. Whether it’s a loose flex cable or a sensor misread, we’ll get your phone back to flawless condition.


        FAQs

        Q1: Why did my proximity sensor stop working after a screen replacement?
        It’s usually due to misalignment or blockage caused during reassembly. Technicians can fix this by cleaning and repositioning the sensor properly.

        Q2: Can I recalibrate my proximity sensor manually?
        Yes, some phones have calibration tools under settings or diagnostic apps. But for accurate results, professional recalibration at Owl Repairs is recommended.

        Q3: Is it dangerous to use a phone with a faulty proximity sensor?
        It’s not dangerous, but inconvenient—it may lead to accidental hang-ups, overheating, or faster battery drain during calls.

        Q4: Can a damaged proximity sensor affect Face ID?
        Yes, since both systems rely on similar infrared mechanisms, a malfunctioning proximity sensor can disrupt facial recognition performance.

        Q5: How long does a proximity sensor repair take at Owl Repairs?
        Most repairs are completed within 30 minutes, depending on the phone model and issue severity.

        Phone Flashlight Not Working or Flickering? Causes & Fixes

        By Uncategorized No Comments
        A close-up of the back of a smartphone, showing the camera lenses and the LED flashlight flickering weakly and erratically, illustrating the blog post's topic of a malfunctioning phone flashlight.

        You reach for your phone to light up a dark room, and… nothing. Or maybe you see a weak, flickering strobe effect that’s more annoying than helpful. When your phone’s flashlight stops working, it’s a surprisingly big problem. You use it for more than just finding your keys; you use it for photos, scanning documents, and navigating at night.

        It’s a common and frustrating issue. But what causes it?

        As a team of certified repair technicians at Owl Repairs, we’sve seen this problem hundreds of times. The good news is that many flashlight issues are related to software glitches you can fix yourself in just a few minutes. The bad news is that it can sometimes point to a deeper hardware problem, especially with the camera system.

        In this guide, we’ll walk you through every possible cause, from the simplest software fixes to the more complex hardware problems. We’ll show you exactly what to do to diagnose and fix your phone’s flashlight.


        Part 1: Understanding Your Phone’s Flashlight

        Before we dive into fixing it, let’s quickly understand what the flashlight is.

        It’s Not Just a Light; It’s Part of Your Camera

        On virtually every modern smartphone, the flashlight (or “torch”) is not a separate part. It is an LED flash built directly into the rear camera module.

        This is the most important fact to know.

        Why? Because it means that any problem with your rear camera can directly affect your flashlight. The same software, drivers, and physical connectors that control your camera also control that flash.

        This is why you might see other strange symptoms at the same time:

        • Your camera app crashes or shows a black screen.
        • The flash option is grayed out or missing inside the camera app.
        • You get an error message like “Camera in use” or “Flash unavailable.”

        When you turn on the flashlight from your control center or quick-settings panel, your phone’s operating system is essentially telling the camera hardware, “Turn on the LED, but don’t activate the camera sensor.”

        If the connection to that camera hardware is loose, corrupted, or damaged, the flashlight command will fail.


        Part 2: Easy Software Fixes (Try These First!)

        Always start here. We see these simple fixes work for over 50% of the phones that come into our shop with this issue. These steps are easy, free, and require no technical skill.

        1. The Simple Restart (The “Have You Tried…”)

        It’s a cliché for a reason. A simple restart clears your phone’s temporary memory (RAM) and shuts down all background processes. If a small, one-time software glitch caused your flashlight to get “stuck,” a reboot will almost always fix it.

        • For most iPhones: Press and hold the side button and one of the volume buttons until the “slide to power off” slider appears. Slide it, wait 30 seconds, then press and hold the side button to turn it back on.
        • For most Androids: Press and hold the power button until the power menu appears. Tap “Restart” or “Reboot.”

        Once your phone is back on, test the flashlight. If it works, you’re done!

        2. Close the Camera App (And All Other Apps)

        Your phone’s software is designed to prevent two apps from using the camera hardware at the same time. This is a common source of conflict.

        The flashlight is the camera. If your camera app is open in the background, it might be holding the hardware “hostage,” preventing the flashlight function from turning on.

        • How to fix: Open your phone’s multitasking view (swipe up from the bottom and hold on newer iPhones/Androids, or press the multitasking button on older Androids).
        • Action: Swipe up on every single open app to close it. Pay special attention to the Camera app, Instagram, Snapchat, TikTok, or any QR code scanning apps.
        • Once all apps are closed, try the flashlight again.

        3. Check for Low Battery or Power Saving Modes

        This is a very common and often overlooked cause. Your phone’s LED flash uses a significant amount of power.

        To protect your battery life, both iOS and Android will automatically disable the flashlight when the battery gets too low (usually under 20% or 10%).

        Furthermore, aggressive Low Power Modes or Battery Saver Modes will also disable the flashlight, even if your battery isn’t critically low.

        • How to fix:
          1. Charge your phone. Plug it in and let it charge for at least 30 minutes. Get it above 20% (or 50% just to be safe).
          2. Disable Low Power Mode.
            • On iPhone: Go to Settings > Battery and toggle “Low Power Mode” OFF.
            • On Android: Swipe down and tap the “Battery Saver” or “Power saving” icon to turn it OFF. You can also find this in Settings > Battery.

        Try the flashlight again. This is often the simple solution people miss.

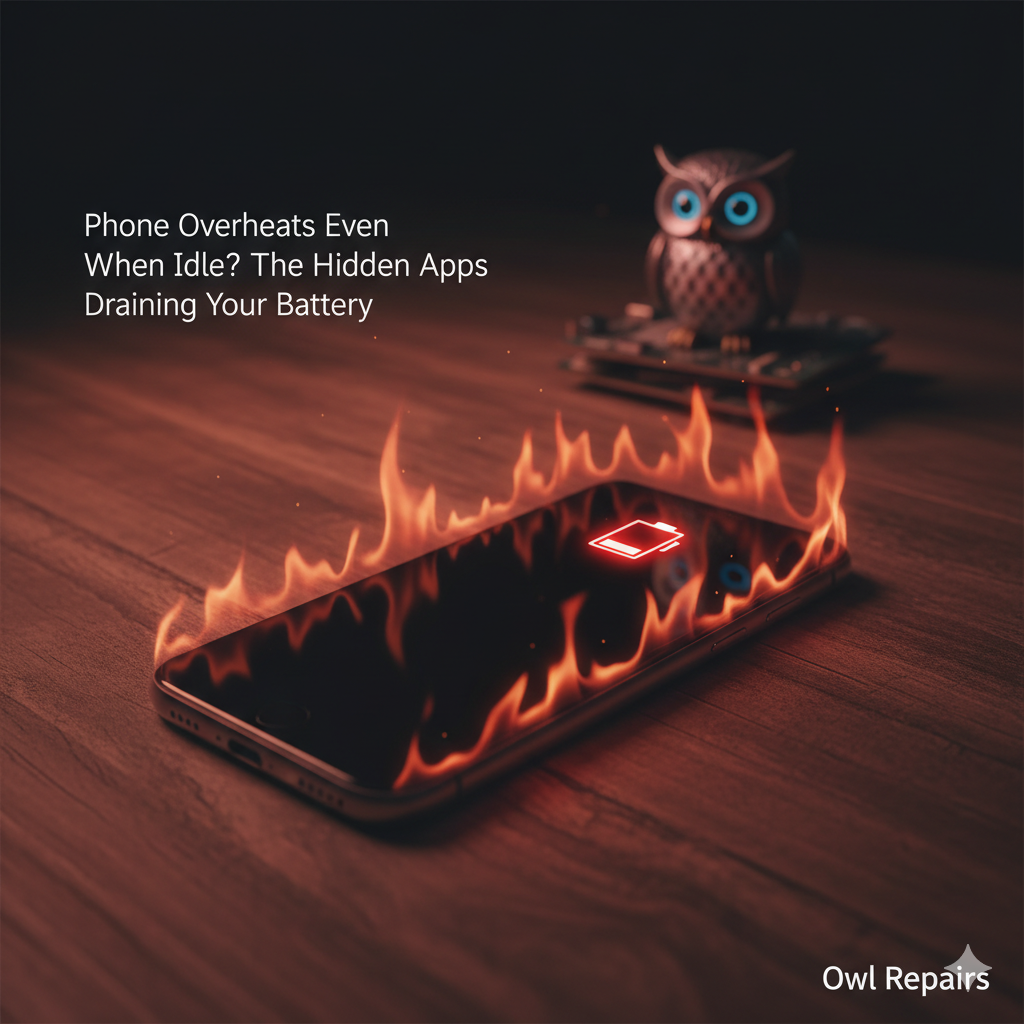
        4. Check for Overheating

        Just like with low battery, your phone has built-in safety features to prevent damage from heat. The LED flash generates a lot of heat in a very small area.

        If your phone is hot, it will disable the flash and flashlight to protect the components. This often happens if:

        • You’ve been gaming for a long time.
        • You left your phone in a hot car or in direct sunlight.
        • You were recording 4K video (which also uses the camera hardware).

        You will often see a “Flash is Disabled” warning on the screen.

        • How to fix: Simply let your phone cool down. Take it out of its case, put it in a shady, cool spot (not a freezer!), and wait 15-20 minutes. Once it’s cool to the touch, the flashlight function should return.

        5. Check App Permissions (Android Specific)

        On Android, you have granular control over what apps can do. It’s possible an app has permission to control the camera or flash and is causing a conflict. It’s also possible a third-party flashlight app you downloaded is the real problem.

        • How to fix:
          1. Uninstall third-party flashlight apps. These are often full of ads and malware and are completely unnecessary. Your phone has a built-in flashlight. Get rid of them.
          2. Check permissions: Go to Settings > Apps > See all apps. Go through the list and look for anything suspicious.
          3. A better way is to check by permission: Go to Settings > Security & privacy > Privacy > Permission manager.
          4. Tap on “Camera.” See which apps have access. Does a strange app you don’t recognize have permission? Revoke it.

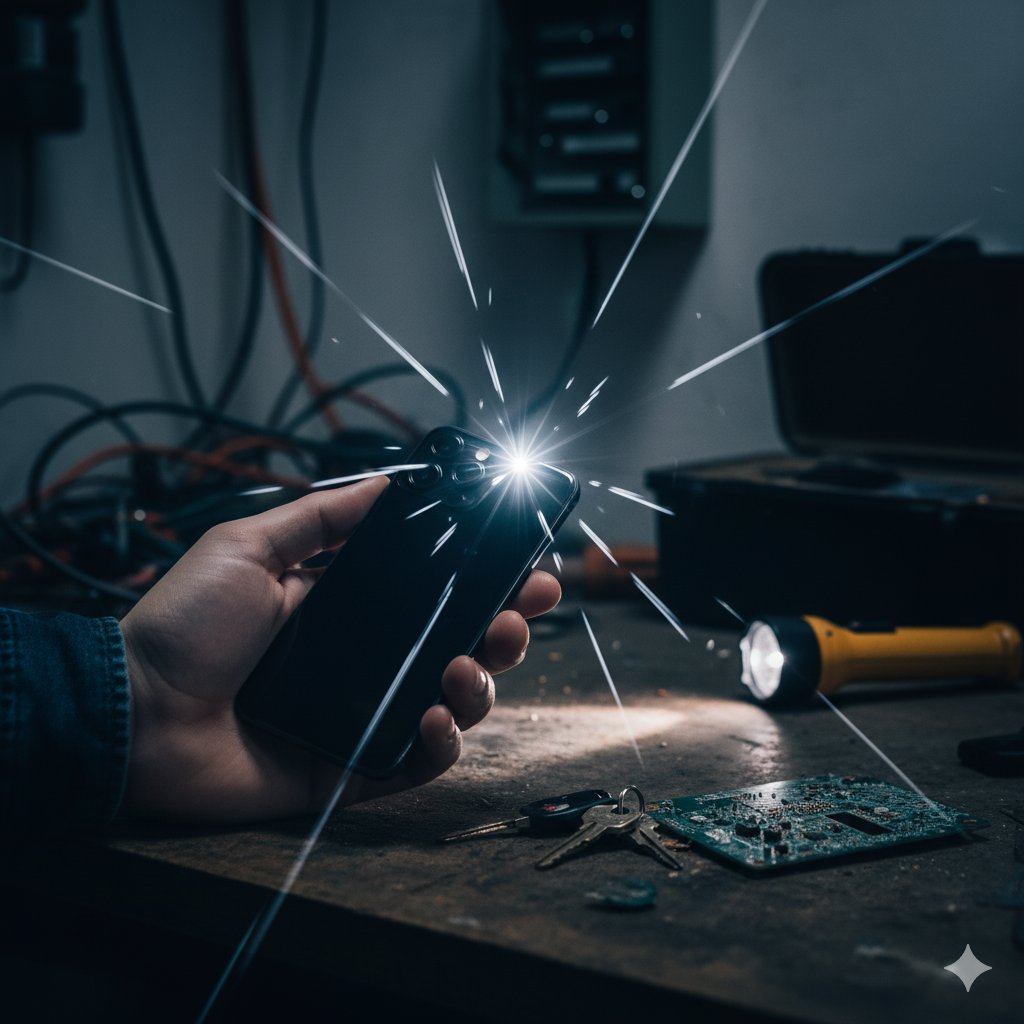
        6. Test the Flash in the Camera App

        This is a key diagnostic step. Does the flash work inside the camera app, but not from the control center? Or does it fail everywhere?

        • How to test:
          1. Open your native Camera app.
          2. Switch to the rear camera.
          3. Find the flash icon (usually a lightning bolt).
          4. Tap it and set it to “On” (not “Auto”).
          5. Take a picture in a dim room.
        • What the results mean:
          • If the flash fires: Great! This means the hardware is working. The problem is a software glitch related to your phone’s quick settings or control center. A “Reset All Settings” (covered in Part 3) will likely fix this.
          • If the flash does not fire (or is grayed out): This points to a deeper issue. It could be a software conflict, a pending update, or a hardware failure. Continue to the next steps.

        Part 3: Advanced Software Troubleshooting

        If the easy fixes didn’t work, it’s time to try some more powerful, but still safe, software solutions.

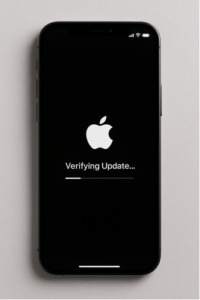
        1. Update Your Phone’s Operating System (iOS/Android)

        Bugs happen. A recent software update might have introduced a bug that affects the camera drivers. Conversely, an old, outdated version of your OS might have an unfixed bug.

        Running an update is a critical step. It refreshes the core system files, rewrites the drivers, and patches known bugs.

        • On iPhone: Go to Settings > General > Software Update. If an update is available, download and install it.
        • On Android: Go to Settings > System > System update (or Software update). Check for updates and install them.

        After the phone restarts, test the flashlight immediately.

        2. Clear the Camera App Cache (Android Specific)

        Over time, an app’s “cache” (temporary data) can become corrupted. Clearing this cache is like giving the app a fresh start without losing any of your data (like photos).

        • How to fix:
          1. Go to Settings > Apps > See all apps.
          2. Find and tap on “Camera.”
          3. Tap on “Storage & cache.”
          4. Tap “Clear Cache.” (Do NOT tap “Clear Storage,” as this may delete your settings).
          5. Restart your phone and test the flashlight.

        3. Boot into Safe Mode (Android Specific)

        Safe Mode is an amazing diagnostic tool. It restarts your phone with all third-party apps disabled. It only loads the essential system apps that came with your phone.

        This is the ultimate test to see if an app you downloaded is the culprit.

        • How to enter Safe Mode:
          1. Press and hold the power button until the power menu appears.
          2. Press and hold the “Power off” or “Restart” icon on the screen.
          3. A new prompt will appear: “Reboot to safe mode.” Tap “OK.”
          4. Your phone will restart, and you’ll see the words “Safe Mode” at the bottom of the screen.
        • Now, test the flashlight.
          • If the flashlight works in Safe Mode: You 100% have a third-party app causing the problem. Restart your phone normally (to exit Safe Mode) and start uninstalling apps you’ve added recently. Start with flashlight apps, camera apps, QR scanners, or anything that might use the camera.
          • If the flashlight still doesn’t work in Safe Mode: The problem is not a third-party app. It’s either the core OS (System) or a hardware failure.

        4. Reset All Settings

        This is a big step, but it’s not as drastic as a factory reset. This option resets all your system settings back to their defaults without deleting any of your personal data (apps, photos, files).

        This is very effective because it fixes any weird, hidden settings you might have changed by accident. It clears Wi-Fi passwords, Bluetooth pairings, and notification preferences, but it often fixes deep-seated software conflicts.

        • On iPhone: Go to Settings > General > Transfer or Reset iPhone > Reset > Reset All Settings. This will not erase your data.
        • On Android: Go to Settings > System > Reset options > Reset all settings (or “Reset app preferences” / “Reset network, app and device settings”). The name varies by manufacturer. Read the description carefully to ensure it won’t erase user data.

        5. The Last Resort: Factory Reset

        This is the final software step. A factory reset (or “Erase All Content and Settings”) wipes your phone completely and reinstalls the operating system from scratch.

        Warning: This will delete all your data—photos, contacts, apps, everything. You must back up your phone before doing this.

        • Why do this? If your flashlight still doesn’t work after all the previous steps, it’s possible the operating system itself is corrupted beyond repair. A factory reset is the only way to get a truly clean-slate version of the software.
        • How to do it:
          • First, back up your phone to iCloud, Google Drive, or your computer.
          • On iPhone: Settings > General > Transfer or Reset iPhone > Erase All Content and Settings.
          • On Android: Settings > System > Reset options > Erase all data (factory reset).
        • After the reset, set up your phone as new. Do not restore from your backup immediately. Test the flashlight.
          • If it works, the problem was a deep software corruption. You can now carefully restore your data.
          • If it still doesn’t work on a brand-new, factory-reset phone… the problem is 100% hardware.

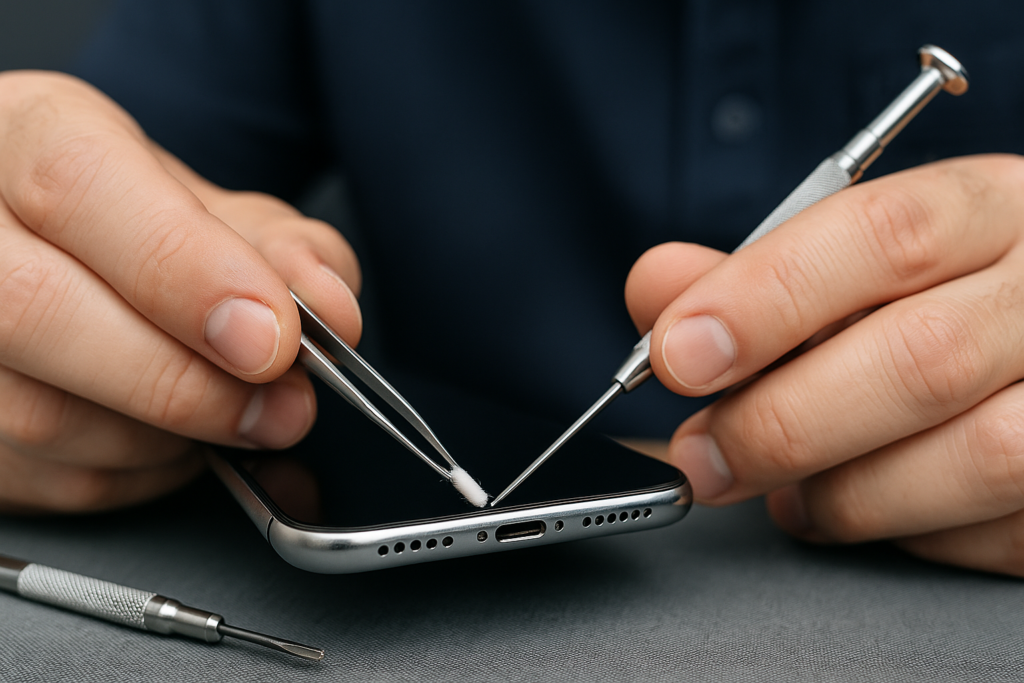
        Part 4: Common Hardware Causes (The “Uh Oh” Fixes)

        If you’ve done a factory reset and the flashlight is still dead, you can stop troubleshooting software. The problem is physical. This is where you’ll almost certainly need a professional repair.

        1. Physical Damage (The Obvious Culprit)

        Did you drop your phone recently? Even a small drop in a “protective” case can be enough.

        Remember: the flashlight is part of the camera module. This module is one of the most delicate components in your phone. It’s connected to the main logic board by a tiny, fragile ribbon cable.

        A drop can easily:

        • Knock the camera connector loose. The cable is just “snapped” onto the board. A good jolt can partially unseat it, cutting the connection to the flash.
        • Crack the LED. The LED itself is small and can crack from a direct impact.
        • Damage the camera module internally. The tiny circuits inside the camera module that control the flash can break.

        2. Water Damage (The Sneaky Culprit)

        “But my phone is water-resistant!”

        Water resistance is not waterproof. That resistance degrades over time. Seals get old, and tiny drops can create micro-cracks that let moisture in.

        When water gets inside, it causes corrosion on the logic board connectors. The camera connector is a common victim. Even a tiny bit of blue-green corrosion on one of the pins can stop the flashlight (and camera) from working.

        You can often check the Liquid Damage Indicator (LDI). It’s a small white sticker inside the SIM tray slot. If it’s pink or red, your phone has been exposed to moisture, and this is very likely your problem.

        3. A Faulty Camera Module

        Sometimes, parts just fail. The camera module is a complex piece of tech. The internal circuitry that powers the LED can burn out or fail over time, even with no drop or water damage.

        In this case, the entire rear camera module needs to be replaced. This is a very common repair.

        4. A Bad Third-Party Repair

        Did you recently get your screen or battery replaced by a cheap, unqualified shop?

        This is a huge source of problems we see. During a different repair (like a screen replacement), the technician has to disconnect the camera module.

        • They might have failed to reconnect it securely.
        • They might have pinched or torn the camera’s delicate ribbon cable.
        • They might have used a screwdriver in the wrong place and damaged a component near the camera connector on the logic board.

        If your flashlight stopped working right after another repair, take it back to that shop. Or, better yet, take it to a reputable one to fix the new problem.


        Part 5: Specific Troubleshooting Guides

        While the steps are similar, the menus and methods differ slightly between iPhones and Androids.

        How to Fix a Flickering or Broken iPhone Flashlight

        iPhones are very locked-down. Your options are more limited but also more straightforward.

        1. Check the Control Center: Swipe down from the top-right (or up from the bottom on older iPhones). Press and hold the Flashlight icon. This should bring up a brightness slider. Try sliding it up and down. Sometimes it’s just set too low.
        2. Close All Apps: Swipe up from the bottom of the screen and pause. Swipe up on all open apps, especially the Camera.
        3. Test the Camera Flash: Open the Camera app, select “Photo,” and tap the lightning bolt. Set it to “On.” Take a picture.
        4. Restart Your iPhone: Press and hold the side button and volume up button. Slide to power off.
        5. Check for Overheating: Is the phone hot? Let it cool down.
        6. Update iOS: Go to Settings > General > Software Update. This is a very common fix for iPhone-specific bugs.
        7. Reset All Settings: Go to Settings > General > Transfer or Reset iPhone > Reset > Reset All Settings. This will not erase your photos or apps.
        8. Factory Reset (Last Resort): Back up to iCloud first. Then go to Settings > General > Transfer or Reset iPhone > Erase All Content and Settings.

        For more official steps, you can check Apple’s official support page for flash issues: https://support.apple.com/en-us/HT203040

        If none of this works, it is a hardware failure. The rear camera module needs to be replaced.

        How to Fix a Flickering or Broken Android Flashlight (Samsung, Pixel, etc.)

        Android is more open, so you have more to check.

        1. Restart the Phone: Press and hold the power button and tap “Restart.”
        2. Check Quick Settings: Swipe down from the top. Tap the “Flashlight” (or “Torch”) icon. If it’s grayed out, there’s a conflict.
        3. Check for Low Battery/Power Saver: Charge your phone and turn off all power-saving modes.
        4. Close All Apps: Open the multitasking view and “Close All.”
        5. Uninstall Flashlight Apps: If you downloaded any app just to be a flashlight, uninstall it now.
        6. Test the Camera Flash: Open your Camera app, find the flash icon, set it to “On,” and take a photo.
        7. Clear Camera App Cache: Go to Settings > Apps > Camera > Storage & cache > Clear Cache. Restart the phone.
        8. Check for Updates: Go to Settings > System > System update.
        9. Boot into Safe Mode: Press and hold the power button, then press and hold the “Power off” icon on the screen. Tap “OK” to reboot to Safe Mode. Test the flashlight here. If it works, an app is the problem.
        10. Factory Reset (Last Resort): Back up your data first. Go to Settings > System > Reset options > Erase all data (factory reset).

        For more tips, you can often find guides from your specific manufacturer, like this one from Samsung’s official support site: https://www.samsung.com/us/support/troubleshooting/TSG01001328/

        If it still fails, it is a hardware problem.


        Part 6: When to Get Professional Help

        You’ve tried everything. You did the restarts, the resets, and even the full factory reset. The flashlight is still dead.

        Stop. It’s time for a professional.

        Continuing to mess with a phone that has a hardware fault can make things worse. Do not try to open the phone yourself. Modern phones are sealed with strong adhesive and filled with delicate components. It is not a simple DIY job.

        You Need a Professional If:

        • The flashlight failed after a drop or water exposure.
        • The flashlight and the rear camera are not working.
        • The flash option is grayed out in the camera app.
        • The flashlight still doesn’t work after a full factory reset.

        This is where we come in. At Owl Repairs, this is a bread-and-butter repair. In 99% of these hardware cases, the solution is a full replacement of the rear camera module. A trained technician can do this safely, typically in under an hour.

        We have the professional tools, high-quality parts, and the expertise to open your phone without damaging it. We can correctly diagnose the issue, whether it’s a loose connector or a dead module, and get it fixed right.

        Best of all, we come to you! You don’t have to mail your phone in or wait at a store. Our mobile repair vans can meet you at your home or office.

        Curious about the cost? It’s often more affordable than you think. You can get a no-obligation instant quote on our website right now.

        What If the Repair Is Too Expensive?

        Sometimes, especially on older models, the cost of a repair might be close to the value of the phone. If a logic board issue is to blame, the repair can be costly.

        In that case, you have other options. Instead of letting it sit in a drawer, you can sell your device to us. We’ll give you a fair price for it, even in its broken state.

        You can then use that cash to upgrade. We also have a wide selection of certified, pre-owned phones you can buy directly from us, giving you a reliable replacement for a great price.


        Part 7: How to Prevent Flashlight Problems

        A little care goes a long way.

        1. Use a Good Case: This is the #1 prevention method. A quality case with a raised lip around the camera module can absorb the impact from a drop, protecting those delicate internal components.
        2. Keep Your Phone Updated: Always install those system updates. They contain critical bug fixes and driver updates for your camera hardware.
        3. Avoid Third-Party “Cleaner” or “Flashlight” Apps: They are unnecessary, clog your phone, and often cause software conflicts.
        4. Keep it Cool and Dry: Don’t leave your phone in a hot car. Don’t take it into a steamy bathroom during a hot shower. Heat and moisture are the biggest killers of electronics.

        Conclusion

        A broken flashlight is a major hassle, but it’s often fixable. Always start with the simple software steps: restart your phone, close your camera app, and check for low battery or overheating.

        If those fail, move on to more advanced steps like system updates and resetting your settings. The “Safe Mode” (on Android) and “Test the Camera Flash” steps are your best diagnostic tools to determine if it’s a software or hardware problem.

        If you find that it’s a hardware issue from a drop or water damage, don’t despair. A professional repair is fast and effective.

        Whether you need a quick repair, want to get a quote, or just have questions, we’re here to help. Explore our services at Owl Repairs or contact us directly. Our expert techs are ready to bring your phone—and your flashlight—back to life.


        Frequently Asked Questions (FAQs)

        Q1: Why is my flashlight flickering or strobing like a disco light? A1: A flickering flashlight is almost always a sign of a hardware failure. It means the LED is receiving inconsistent power. This is often caused by a loose connector or water damage creating a short circuit. It can be a rare software bug, but it’s much more likely a hardware problem that needs repair.

        Q2: Why is my flashlight icon grayed out in the Control Center / Quick Settings? A2: This means the operating system knows it cannot access the hardware. This is usually due to (1) another app (like the Camera) actively using it, (2) the phone being too hot or on low battery, or (3) a hardware fault where the camera module is completely disconnected or broken.

        Q3: My flashlight turns on, but it’s very dim. What’s wrong? A3: On many phones, you can adjust the flashlight brightness. On an iPhone, press and hold the flashlight icon in the Control Center to see the brightness slider. On Android, you can often tap the word “Flashlight” (instead of the icon) in the Quick Settings to see a similar slider. If it’s already at max, a dim LED can be a sign of a failing hardware component or a battery that is struggling to provide enough power.

        Q4: Will a factory reset delete my photos? A4: Yes. A factory reset (or “Erase All Content and Settings”) will delete everything on your phone. It returns the phone to the state it was in when it came out of the box. You must back up all your photos, contacts, and important files before performing a factory reset.

        Q5: Can I just replace the tiny LED bulb? A5: No. The LED is not a separate, replaceable “bulb.” It is permanently integrated into the entire rear camera module. To fix a broken LED, you must replace the whole camera unit. This is a complex repair that requires opening the phone.


        Disclaimer

        The information provided in this post is for educational purposes only. While the software-based steps are safe for you to perform, do not attempt to open your phone or perform a hardware repair yourself unless you are a trained professional. You can easily cause further damage to your device, leading to more expensive repairs. For any hardware issues, please consult a certified repair technician, such as the experts at Owl Repairs.

        Why Your Phone Shows a Black Screen During a Call? Voice-Only Mode Explained & How to Fix It

        By Blog No Comments
        A man looks confused and slightly frustrated while holding a smartphone with a completely black, unresponsive screen, indicating a problem during a call.

        Have you ever been on an important call, pulled the phone away from your ear to use the keypad, and been met with… nothing? Just a stubborn, unresponsive black screen. Suddenly, you can’t hang up, mute the call, or even put it on speaker. It’s a moment of pure technological frustration, and in some cases, panic. Is your phone broken? Are you stuck in some strange “voice-only mode”?

        This common issue is one of the top problems we see at our repair centers. While it feels like a major failure, this “black screen” is actually a feature—when it’s working correctly. When it’s not, it becomes a significant problem, trapping you in a call you can’t control.

        As a team of certified device repair technicians with over a decade of experience diagnosing and fixing thousands of smartphones, we want to help you understand why this happens and how to fix it. This isn’t just an inconvenience; a phone that doesn’t respond when you need it to can be a safety issue.

        In this definitive guide, we will explore the science behind that black screen, walk you through a complete 9-step diagnostic process (from simple 30-second fixes to more advanced troubleshooting), and explain when it’s time to call a professional.

        Section 1: The “Black Screen” Explained: It’s a Feature, Not a Bug (Usually)

        Before we dive into the fixes, it’s crucial to understand the component responsible for this behavior. That black screen isn’t a “mode” but the action of a tiny, unsung hero in your device: the proximity sensor.

        What is a Proximity Sensor and How Does It Work?

        A small piece of hardware called a proximity sensor sits tucked away at the very top of your phone, near the earpiece speaker and front-facing camera. You can’t usually see it, but it’s always working.

        This sensor’s job is simple: to detect how close your phone is to another object (like your face).

        The Infrared (IR) Process

        The sensor typically works by emitting a beam of invisible infrared (IR) light. When you’re not on a call, this sensor is mostly dormant. The moment you place or answer a call, the sensor activates.

        • When you hold the phone to your ear, your face reflects that IR light back to the sensor.
        • The sensor detects this high level of reflected light and immediately tells the phone’s operating system, “An object is near! Turn off the display.”
        • When you pull the phone away from your ear, the IR light no longer reflects.
        • The sensor detects the absence of the reflection and tells the OS, “The object is gone! Turn the display back on.”

        This entire process is instantaneous and is a core function of every modern smartphone, from the latest iPhone to every Android device.

        Why Do Phones Need This? The 3 Core Benefits

        This feature, which we’ll call “proximity blanking,” is essential for three main reasons:

        1. Prevents Accidental Input: This is the big one. Your cheek and ear can easily interact with a touchscreen. Without the proximity sensor, you would be constantly and accidentally muting calls, putting people on hold, dialing numbers on the keypad, or even hanging up. Turning the screen off completely eliminates this “cheek-dialing” problem.
        2. Saves Battery Life: The smartphone display is, by a massive margin, the most power-hungry component on your device. Leaving it on for a 30-minute phone call would drain your battery significantly. Proximity blanking is a critical power-saving feature.
        3. Reduces Heat: A display that is on generates heat. By turning it off when it’s pressed against your skin, the phone remains cooler and more comfortable to hold for long conversations.

        So, the “black screen” itself is normal. The problem arises when the sensor gets confused and the screen stays black even after you pull it away from your face. This is when the feature becomes a fault.

        Section 2: The “Why”: Common Causes for a Stuck Black Screen

        When your phone’s screen refuses to turn back on during a call, it means the proximity sensor is incorrectly telling the phone that it’s still next to your face. We can trace this failure back to two main categories: software glitches or hardware faults.

        Based on our repair experience, here is the breakdown of the most common culprits, from simple to complex.

        Category 1: Simple & Reversible Issues (The “DIY” Problems)

        These are the most common causes and, luckily, the easiest to fix. They all involve something physically blocking the sensor or confusing the software.

        • A Dirty or Smudged Screen: This is the #1 cause we see. The glass at the top of your phone covers the proximity sensor. If grease, makeup, oils from your skin, or even just a heavy layer of dust obscures this small area, it blocks the sensor’s IR light. The sensor mistakes this blockage for your face and keeps the screen off.
        • Poorly Fitted Screen Protectors: Many budget or incorrectly installed screen protectors can be a proximity sensor’s worst nightmare. They may have a slightly misaligned cutout, or the manufacturer may have made them from a material that scatters or reflects the IR light improperly. Even high-quality protectors, if they get a speck of dust or an air bubble underneath them right over the sensor, will cause this issue.
        • Bulky or Improperly Designed Phone Cases: Some “tough” or “rugged” cases have a thick top lip or bezel that rises far above the screen. This lip can be just large enough to cast a shadow or partially block the sensor, tricking it into thinking your face is near.

        Category 2: Software Glitches & App Conflicts

        Sometimes, the hardware is fine, but the software telling it what to do is confused.

        • A Recent OS Update: A new update to iOS or Android can sometimes contain bugs. It’s possible for an update to miscalibrate the sensor’s sensitivity, causing it to be too sensitive (thinking your face is there when it isn’t) or not sensitive enough.
        • Third-Party App Conflicts: The problem might not be your main phone dialer. If this issue only happens when you’re on a call with an app like WhatsApp, Telegram, Skype, or Google Voice, that app may have a bug or a permission issue that is conflicting with the sensor’s normal operation.
        • Corrupted System Cache: Over time, your phone’s system cache—a collection of temporary files used to speed things up—can corrupt. This can lead to all-around strange behavior, including sensor malfunctions.

        Category 3: Hardware Failure & Physical Damage

        This is the most serious category, where the sensor itself or its related components are broken. This almost always requires professional repair.

        • A Hard Drop (Impact Damage): The proximity sensor is a delicate component, often part of a larger “flex cable” assembly with the front camera and earpiece. A hard drop, even one that doesn’t crack the screen, can be enough to dislodge the sensor from its mounting, sever a tiny connection, or damage it internally.
        • Water Damage: Liquid is the enemy of electronics. Even a small amount of moisture (from rain, steam, or a splash) can get into the earpiece grille and cause corrosion on the sensor’s connectors, leading to an immediate or eventual failure.
        • A Botched Screen Replacement: This is tragically common. If you’ve recently gotten a screen replacement at an unauthorized or inexperienced repair shop, there’s a high chance the technician damaged the proximity sensor, failed to transfer it correctly to the new screen, or misaligned it during reassembly.

        Section 3: Your 9-Step Guide to Fixing the Black Screen Problem

        Let’s walk through the troubleshooting process like a professional technician would. Start with Step 1 and do not skip any, as the solution is often the simplest one.

        The Immediate Workaround: How to End a Call NOW

        Before you fix the root cause, you need a way to end the call you’re trapped in. There is a built-in accessibility feature for this: pressing the side (Power) button.

        On almost all smartphones, this action will end an active call. If it doesn’t, you may need to enable the setting (once you regain control of your screen).

        How to Enable “Power Button Ends Call”
        • On Android (Samsung, Pixel, etc.): Go to Settings > Accessibility > System controls > and toggle on "Power button ends call".
        • On iPhone: This is the default behavior. Pressing the side button (or top button on older models) will lock the screen and end the call.

        Now that you’re not stuck, let’s find the real problem.


        Phase 1: The “Simple Fixes” Checklist (Do These First)

        Step 1: Clean the Top of Your Screen This is the fix in at least 50% of cases. Take a clean, dry microfiber cloth (like one you’d use for eyeglasses) and thoroughly wipe the top edge of your phone, over the earpiece speaker and camera area. Remove all smudges, makeup, and oil. Make a test call to a friend (or your voicemail) to see if this resolves the issue.

        Step 2: Remove Your Case and Screen Protector If cleaning didn’t work, the next step is to remove all accessories. Take your phone completely out of its case. Then, carefully peel off your screen protector. (Yes, even if it’s brand new). Now, make another test call. If the screen behaves normally, you have found your culprit. It was either the case or the protector.

        Step 3: Perform a “Soft Reset” (Restart) This is the classic “turn it off and on again” fix, and it works for a reason. A simple restart can clear minor software glitches and memory conflicts that might be confusing the sensor.

        • For most Android phones: Press and hold the power button, then tap “Restart.”
        • For iPhones: Press and hold the side button and either volume button until the “slide to power off” slider appears. Slide it, wait 30 seconds, then press and hold the side button to turn it back on.

        Phase 2: Software Troubleshooting (The “Deeper” Fixes)

        If the problem persists, it’s time to look at software.

        Step 4: Perform a “Hard Reset” (Force Restart) A hard reset is more forceful than a simple restart. It cuts the power to the components and forces the phone’s memory to clear completely. This is extremely effective for more stubborn software freezes.

        • For iPhone 8 or newer: Quickly press and release the Volume Up button. Quickly press and release the Volume Down button. Then, press and hold the Side button until you see the Apple logo appear.
        • For Android phones (most models): Press and hold the Power button and the Volume Down button simultaneously for 10-15 seconds until the phone restarts.

        Step 5: Update Your Operating System (OS) That black screen could be a known bug that Apple or Google has already fixed in a new patch. Ensure your phone is running the absolute latest software.

        • On iPhone: Go to Settings > General > Software Update.
        • On Android: Go to Settings > System > System update (or Software update).

        Step 6: Test in “Safe Mode” (Android Only) This is a brilliant diagnostic tool. Safe Mode restarts your Android phone and disables all third-party apps.

        • To enter Safe Mode: Press and hold the power button. When the “Power off” icon appears, press and hold the “Power off” icon on your screen. A prompt for “Safe Mode” will appear. Tap it.

        Once in Safe Mode (you’ll see the words on-screen), make a test call.

        • If the problem is GONE, you know 100% that a third-party app you downloaded is the cause. Restart your phone normally and start uninstalling recent apps (especially dialers, call recorders, or VOIP apps) one by one until the problem is fixed.
        • If the problem persists in Safe Mode, it’s not a third-party app.

        Step 7: Reset All Settings This is a final software step before getting drastic. It will not delete your data (photos, contacts, apps), but it will reset all your system settings (Wi-Fi passwords, Bluetooth pairings, accessibility settings) back to their factory defaults. This often resets faulty sensor calibrations.

        • On iPhone: Go to Settings > General > Transfer or Reset iPhone > Reset > Reset All Settings.
        • On Android: Go to Settings > System > Reset options > Reset all settings (or Reset Wi-Fi, mobile & Bluetooth).

        Phase 3: Hardware Diagnosis (The “Moment of Truth”)

        If you have done all 7 steps above and the screen still goes black, the problem is almost certainly a faulty piece of hardware. Here’s how to confirm.

        Step 8: Use a Hardware Test Code (Android Only) Many Android phones, particularly Samsung, have a “secret” diagnostic menu.

        1. Open your phone’s dialer.
        2. Type in the code *#0*#
        3. A diagnostic screen with many buttons will appear. Tap the button that says “Sensors.”
        4. Look for “Proximity Sensor.” Place your hand over the top of your phone. The screen should turn green and vibrate.
        5. If you move your hand away, it should return to a white screen.
        6. If the screen stays green even with your hand away, your sensor is stuck/broken.

        Step 9: The Voice Memo Test (iPhone) iPhones don’t have secret codes, but this is an excellent technician’s trick.

        1. Open the “Voice Memos” app.
        2. Start a new recording.
        3. While it’s recording, cover the top of your phone (where the earpiece is) with your finger.
        4. If the proximity sensor is working, the screen will go black, just like on a call.
        5. If you start a recording and the screen immediately goes black (before you even cover it), or if it never goes black when you cover it, the sensor is confirmed to be faulty.

        If your phone fails either of these hardware tests, no amount of software troubleshooting will fix it. The component has failed.

        Section 4: The Solution: Professional Repair & Future Prevention

        You’ve done the work. You’ve cleaned the screen, reset the software, and confirmed with a hardware test that the sensor itself is the problem. Your DIY journey ends here, and it’s time to let an expert take over.

        What Does a Professional Repair Involve?

        When you bring your device to a trusted repair shop, a technician will open the device and perform one of several fixes, depending on the cause:

        1. Re-alignment: If the sensor was just dislodged from a drop, it may simply need to be reseated in its proper mounting bracket.
        2. Cleaning: The technician can clean the inside of the sensor lens and the underside of the screen glass, removing any internal dust that was blocking it.
        3. Flex Cable Replacement: Most often, the proximity sensor is part of a larger component called the “Front-Facing Camera & Sensor Assembly.” The entire flex cable, which may also include the earpiece connectors and front camera, will be replaced with a new part.

        This is a delicate operation, especially on iPhones where the sensor assembly is paired to the logic board for Face ID. Using an inexperienced shop can result in Face ID being permanently disabled. That’s why trusting certified professionals is essential.

        If your phone is suffering from this or any other issue, our team at Owl Repairs can provide a fast, reliable diagnosis. You can get an Instant Quote right now to see your options. And if you can’t get to us, We Come To You with our mobile repair service.

        Is a Repair Worth It? (Repair vs. Replace)

        In most cases, a proximity sensor repair is a cost-effective fix that can add years to your phone’s life. However, if the phone is very old or has other issues (like a failing battery and a cracked back), you might be facing multiple repairs.

        At this point, you have options. You could Sell Your Device to us (we buy devices even with faults) and put that cash toward a new phone. Or, you can browse our inventory of certified refurbished devices and Buy a Device that is guaranteed to work perfectly, saving you money and an unnecessary trip to a big-box store.

        Conclusion: Regaining Control of Your Calls

        A phone screen that goes black during a call is a deeply frustrating problem, transforming a simple “feature” into a major fault. It’s (usually) your proximity sensor, which is designed to prevent accidental screen taps and save battery.

        As we’ve covered, the solution can be as simple as wiping your screen or removing a faulty screen protector. But it can also be a sign of a deeper software glitch or a true hardware failure from a drop or water damage. By following our 9-step guide, you can confidently diagnose the issue yourself.

        Don’t let a faulty sensor control your conversations. Whether you need a simple fix, a professional repair, or a complete upgrade, Owl Repairs has the expertise to get your device—and your peace of mind—back in working order.


        Frequently Asked Questions (FAQs)

        Q1: Why does my iPhone screen go black on WhatsApp or Facebook Messenger calls? A1: This is almost always an app-specific issue. The app may not have been updated to work with your latest iOS version, or its permissions are bugged. The first fix is to go to the App Store and update the app. If that fails, try deleting the app, restarting your iPhone, and then reinstalling it. This forces it to re-establish its connection with the phone’s hardware, including the proximity sensor.

        Q2: Can I just disable the proximity sensor permanently? A2: On iPhones, no. Apple does not allow you to disable this core function. On some Android models, there are third-party apps or “Developer Mode” settings that claim to disable it, but we strongly advise against this. You will run into constant issues with accidental muting, and your battery will drain significantly faster. It’s always better to fix the root cause.

        Q3: How much does it cost to fix a broken proximity sensor? A3: The cost varies widely depending on your phone’s model and the extent of the damage. For some models, it’s a simple re-alignment. For others, it requires a full front-flex cable replacement. The only way to know for sure is to get a diagnosis from a professional. You can get a no-obligation Instant Quote on our website to get a clear idea of the cost for your specific device.


        Disclaimer

        The information provided in this blog post is for educational and informational purposes only and does not constitute professional technical advice. While we strive to provide accurate, step-by-step instructions, any DIY troubleshooting or repair attempts are performed at your own risk. Owl Repairs is not liable for any damage that may occur to your device from following these guides. If you are not comfortable performing any of the steps listed (especially those involving software resets), we strongly recommend seeking help from a certified professional.

        How to Fix iPhone Stuck on “Verifying Update” (iOS 18 & Later) | Safe Steps Before Repair | Owl Repairs

        By Blog No Comments

        An iPhone lying on a light gray desk showing the “Verifying Update…” screen with the Apple logo and progress bar during an iOS 18 installation process.

        Written by Scott Vo

        You finally hit Update Now on your iPhone, but instead of installing smoothly, it gets stuck on that dreaded message — “Verifying Update…” No matter how long you wait, nothing changes.

        Don’t panic! This issue is quite common with major iOS updates, especially iOS 18 and later. In most cases, it’s fixable without losing your data.

        In this complete guide, our experts at Owl Repairs explain safe, step-by-step solutions you can try at home. You’ll also learn when it’s time to visit a professional repair shop if your phone still refuses to update.


        1. Why iPhones Get Stuck on “Verifying Update”

        When your iPhone verifies an update, it’s checking whether the downloaded file is genuine and intact. This process involves connecting to Apple’s servers, verifying digital signatures, and ensuring your device is compatible.

        However, a few things can interrupt this process and cause the phone to freeze.

        Common Causes

          • Unstable Internet Connection:
            Verification requires a strong connection. A weak or dropped Wi-Fi signal can interrupt communication with Apple servers.
            (Apple confirms this on their support page).

          • Corrupt Update File:
            If the iOS file is partially downloaded or damaged, the system may loop on “Verifying.”

          • Low Storage Space:
            Updating needs extra space to unpack and verify files. If your iPhone’s storage is nearly full, verification may fail.

          • Server Delay or Overload:
            Right after a major iOS release, Apple’s servers are overloaded — verification may simply take longer.

          • Software Bugs or Cache Errors:
            Background glitches can cause verification loops even on perfectly fine networks.

        If you’re experiencing these issues repeatedly, it’s best to contact a repair professional or try a manual computer-based update, as explained below.


        2. Key Insights Before Attempting Fixes

        Before you start troubleshooting, keep these essentials in mind:

        2.1 Always Back Up Your Data

        Before trying any fix, back up your iPhone to iCloud or Finder/iTunes.
        If anything goes wrong, you can restore your data safely.

        2.2 Check Device Compatibility

        Older iPhones may not fully support iOS 18. Make sure your model is listed on Apple’s compatibility page.

        2.3 Don’t Rush

        Many users restart or reset too early. Always wait at least 15–20 minutes on the “Verifying Update” screen before assuming it’s frozen.


        3. Safe Steps to Fix “Verifying Update”

        These steps are arranged from easiest to most advanced. Follow in order for best results.


        Step 1: Wait and Ensure Stable Wi-Fi

        Sometimes, the process isn’t truly stuck — it’s just slow.
        Keep your phone plugged in, maintain Wi-Fi, and let it run for 15–20 minutes. If the “Verifying Update” text remains longer, move on.


        Step 2: Force Restart the iPhone

        This clears temporary glitches without erasing data.

        For iPhone 8 or newer:

        – Press Volume Up, then Volume Down, then hold Side (Power) until you see the Apple logo.

        For iPhone 7 / 7 Plus:

        – Hold Side + Volume Down until you see the Apple logo.

        After restart, check if your update resumes.


        Step 3: Delete the Update File and Re-Download

        If your download was corrupted, removing it fixes the loop.

        – Go to Settings → General → iPhone Storage.

        – Scroll down and tap the iOS 18 update file.

        – Tap Delete Update.

        – Restart your phone.

        – Re-download via Settings → General → Software Update.

        Once done, try installing again.
        If the issue repeats, consider visiting Owl Repairs’ Instant Quote Widget to request expert help.


        Step 4: Reset Network Settings

        If Wi-Fi or DNS issues are interfering:

        – Go to Settings → General → Transfer or Reset iPhone → Reset → Reset Network Settings.

        – Reconnect to your Wi-Fi and retry the update.

        This method doesn’t delete your data but resets saved Wi-Fi, VPN, and cellular settings.


        Step 5: Update via Computer (Finder/iTunes)

        A wired update often bypasses verification problems.

        – Connect your iPhone to a Mac or PC.

        – Open Finder (macOS Catalina +) or iTunes (Windows/macOS Mojave −).

        – Select your device and click Check for Update.

        – Follow the prompts to reinstall iOS.

        If you’re unsure how to perform this safely, our certified team can assist through We Come to You Mobile iPhone & Android Repair.


        Step 6: Enter Recovery Mode

        If the update still fails:

        – Connect your iPhone to a computer.

        – Force restart and keep holding until you see the Recovery Mode screen.

        – On your computer, click Update (try before “Restore”).

        This will reinstall iOS without erasing your files.


        Step 7: Use DFU Mode (Advanced)

        If all else fails, DFU Mode reinstalls both iOS and the firmware layer.
        It’s powerful but erases everything — use only if you have a full backup.

        If your device repeatedly fails updates, it may indicate deeper hardware or NAND memory issues, requiring inspection.
        You can schedule a professional diagnostic with Owl Repairs to avoid data loss.


        Step 8: Contact a Professional

        If the “Verifying Update” message keeps looping after all the above steps, it’s time for expert help.

        Bring your device to your nearest Owl Repairs location or request a quote online.
        We handle iOS update errors, system reinstallation, and microsoldering-level board repairs.

        You can also sell your old device or buy a refurbished one directly through us.


        4. Preventing the Issue in Future

            • Always update when your battery is above 50%.

            • Use stable Wi-Fi and keep your phone on charge during updates.

            • Free up at least 5 GB before installing major iOS releases.

            • Avoid cancelling downloads midway.

            • Restart your phone before every major update to clear cache.


          5. FAQs

          Q1: How long does “Verifying Update” normally take?
          Usually 5–10 minutes. If it exceeds 20 minutes, follow the steps above to restart or delete the update file.

          Q2: Will I lose my data if I force restart?
          No. Force restart simply reboots the system — your data remains safe.

          Q3: Can I use mobile data for updates?
          Apple restricts OTA updates over cellular for large files. Always use Wi-Fi or a computer.

          Q4: What if none of these steps work?
          It may be a storage or board-level fault. You can contact Owl Repairs for advanced diagnostics.

          Q5: Can I update using someone else’s computer?
          Yes, but ensure you trust the computer and sign out afterward to protect your Apple ID.


          8. Disclaimer

          This article is for informational and educational purposes only. The steps outlined are safe when followed correctly, but results may vary based on device condition. Owl Repairs is not liable for any unintended data loss or damage caused by improper handling.

          If you’re unsure or uncomfortable performing these steps, please seek professional help from an Apple Authorized Service Provider or Owl Repairs’ certified technicians.

          Phone Keeps Freezing? Causes, Quick Fixes & When to Get a Professional Repair

          By Blog No Comments

          Illustration of a smartphone with a sad face icon on the screen and a hand tapping it, alongside the blog title “Phone Keeps Freezing? Causes, Quick Fixes & When to Get a Professional Repair” on a blue background — symbolizing a phone troubleshooting guide.

          Written by Scott Vo

          You’re mid-scroll through TikTok or typing an important message when — boom — your phone freezes. The screen locks up, taps don’t register, and frustration hits instantly.

          It’s a situation almost every smartphone user has faced. Whether it’s an iPhone, Samsung, or another Android device, freezing can be caused by anything from software bugs to hardware failure.

          This guide from Owl Repairs, your trusted phone repair experts, breaks down the main causes, easy fixes, and when it’s time to stop guessing and call in a pro.


          Why Your Phone Keeps Freezing

          Before fixing it, let’s understand why it happens. A frozen phone isn’t always about “bad luck” — it’s a sign something’s wrong underneath.

          1.1. Low Storage Space

          Your phone needs free memory to run smoothly. When storage is full, apps and the operating system slow down — leading to freezing or crashing.

          Tip: Keep at least 10–15% of your total storage free. Delete unused apps, duplicate photos, and old videos.


          1.2. Too Many Background Apps

          Apps running in the background consume memory (RAM). When RAM is full, your phone struggles to keep up.

          Try This:

          • Close unused apps manually.
          • Restart the phone to clear cached processes.


          1.3. Software Bugs or Outdated OS

          Outdated or buggy software versions can cause lag and freezing — especially right after a system update or if you’ve skipped several updates.

          Fix:
          Go to Settings → General → Software Update (iPhone) or Settings → System → Software Update (Android). Always keep your device updated.


          1.4. Overheating

          Phones automatically throttle performance when they get too hot — leading to freezes or slow responses.

          Common Causes of Overheating:

          • Using the phone while charging
          • Heavy gaming
          • Background updates
          • Direct sunlight exposure

          Learn more in our related guide: Why Is My Phone Overheating So Quickly?


          1.5. Corrupted Apps or Malware

          Sometimes a single bad app can crash your entire system. Malware from suspicious downloads can also freeze your device.

          Fix:

          • Uninstall recently downloaded apps.
          • Run a malware scan (on Android).
          • Avoid installing apps outside Google Play or App Store.


          1.6. Failing Battery or Hardware

          If your phone freezes and restarts randomly, it could be a sign of battery degradation, logic board issues, or failing internal components.

          This is when you should let an expert take over — especially if the problem repeats after every charge cycle.


          Quick Fixes You Can Try at Home

          Now that you know the likely culprits, let’s go over safe, effective fixes to try before scheduling a repair.


          2.1. Restart the Phone

          This sounds simple — but restarting clears temporary cache and fixes minor software bugs.

          • Hold down the Power button → tap Restart.
          • For iPhone, press Volume Up + Power, slide to power off, then turn back on.


          2.2. Check Storage & Free Up Space

          • Delete unused apps and cache.
          • Move photos/videos to cloud storage.
          • Empty “Recently Deleted” albums.


          2.3. Update All Apps

          Open your App Store or Google Play, tap Update All, and make sure everything is current. Outdated apps often conflict with the system and cause freezes.


          2.4. Remove Widgets & Live Wallpapers

          Dynamic wallpapers, heavy widgets, and live themes consume RAM. Use simpler options for better performance.


          2.5. Boot into Safe Mode (Android)

          Safe Mode disables third-party apps and helps you test if one of them is causing the freeze.

          • Hold Power → tap and hold Power Off → select Safe Mode.
            If your phone works fine, one of your apps is to blame.


          2.6. Reset All Settings

          If freezes persist, reset settings without deleting your data.

          • iPhone: Settings → General → Transfer or Reset → Reset All Settings
          • Android: Settings → System → Reset Options → Reset All Settings


          2.7. Factory Reset (Last Resort)

          If nothing works, back up your data and perform a factory reset to clear deep software corruption.
          Always do this before taking it to a repair shop — it helps isolate software vs. hardware problems.


          When It’s Time to Seek Professional Help

          Some freezing problems go beyond DIY fixes. Here’s when you should reach out to a technician:

          1. Phone freezes even after reset
          2. Frequent restarts or black screens
          3. Screen freezes during calls or charging
          4. Device heats up excessively
          5. Physical or water damage history

          At Owl Repairs, technicians diagnose issues using advanced tools that check RAM health, logic board integrity, and software corruption — far beyond what home users can test.

          Get an instant quote for your device today at our Instant Quote Widget.


          How Owl Repairs Can Help

          Whether it’s a frozen iPhone, lagging Samsung, or unresponsive Android, our team provides:

          Need quick help? Reach us anytime through Contact Us.


          Prevent Future Freezing

          Once your phone is back to normal, follow these steps to keep it that way:

          • Keep storage at least 10% free
          • Regularly restart your phone
          • Avoid cheap chargers or overheating situations
          • Update iOS/Android promptly
          • Only download trusted apps
          • Periodically clear app cache
          • Schedule preventive diagnostics with professionals

          These habits keep your phone fast and extend its lifespan.


          Conclusion

          A freezing phone isn’t always a death sentence — but it’s definitely a warning sign. From low storage and overheating to hardware faults, causes can vary widely.

          You can solve most cases with quick maintenance, but when the problem keeps returning, let professionals like Owl Repairs handle it safely.

          Don’t let your phone slow you down — get a free quote today and restore your phone’s speed and stability!


          FAQs

          Q1: Why does my phone freeze during calls or charging?
          A1: That’s often linked to overheating or a failing battery. Try cleaning your charging port or replacing the battery if it’s old.

          Q2: Can low storage cause freezing?
          A2: Yes. When your device runs out of free memory, it can’t process new tasks, causing screen lag and system hang.

          Q3: My phone freezes randomly — is it a virus?
          A3: Possibly. Malware-infected apps can hijack memory and slow performance. Delete suspicious apps and run antivirus scans.

          Q4: Should I repair or replace my phone if it keeps freezing?
          A4: If repair costs less than 40% of your device value, repairing is usually worth it. Owl Repairs can inspect and advise honestly.

          Disclaimer

          This article is for informational purposes only. Always back up your data before performing resets or updates. For complex hardware issues, consult a certified technician to avoid permanent damage.

          How to Fix iPhone Face ID Not Working (Step-by-Step Guide) | Owl Repairs

          By Blog No Comments
          Illustration showing a hand tapping an iPhone screen displaying a sad Face ID icon, with the text “How to Fix iPhone Face ID Not Working (Step-by-Step Guide)” on a blue background — representing a tech repair tutorial.

          Imagine you wake up, open your iPhone, and… Face ID refuses to work. You stare blankly at your lock screen, forced to punch in your passcode — again. Frustrating, right?

          If you’re here, you’re probably facing exactly that problem: Face ID not working. Maybe your phone shows “Face ID not available,” or maybe it just never recognizes your face. Either way, you want answers and a fix.

          I’m Scott Vo, and every day we help users in Rawalpindi and beyond diagnose iPhone hardware and software issues. This issue intersects both user convenience and device security — a kind of YMYL (Your Money, Your Life) topic since device security matters. That’s why in this guide you’ll find not only clear steps you can follow, but also safe practices and pointers for when to seek professional repair help.

          By the time you finish this post, you should (hopefully) have your Face ID working again — or at least know the precise reason why it isn’t.


          Understanding Face ID — How It Works & Why It Fails

          Before diving into fixes, it helps to understand what Face ID is and the common failure points. This builds trust (EEAT) and lets you better interpret error messages or symptoms.

          1.1 What is Face ID & the TrueDepth system

          • Face ID uses a front-facing TrueDepth camera system that combines an IR flood illuminator, dot projector, and IR camera to map your face in 3D space and authenticate you. Apple Support+1

          • Because of how sensitive this system is, even minor obstructions (smudges, dirt, cracked screen) or software bugs can disrupt Face ID. help.backmarket.com+1

          • On newer iPhones, some parts of the Face ID system (e.g. cameras, flood illuminator) are cryptographically paired with the Secure Enclave. That means replacing one component (e.g. after a screen repair) incorrectly can break Face ID permanently until properly re-paired. ipadrehab.com

          1.2 Common failure modes

          Here are the frequent reasons Face ID stops working:

          Type of IssueSymptoms / CluesExplanation
          Obstruction / dirt / cover“Camera covered” warning, inability to scan face, smudgy screenSomething (film, case, oil) is blocking the TrueDepth sensors.
          Software / settingsFace ID toggles disabled in settings; “Face ID not available” errorMisconfigured settings, bugs, OS update issues.
          Hardware damage / repair errorNo Face ID options, errors about “TrueDepth camera,” or “Face ID disabled”A hardware component (flood illuminator, dot projector, flex cables) failed or was tampered. ipadrehab.com+1
          Security / pairing issueDevice reports parts as “unknown,” Face ID cannot be enabledReplacement parts not properly authenticated with Apple’s secure pairing.
          iOS version / update bugFace ID broke right after an iOS updateSometimes software interference or bugs in new firmware disrupt Face ID. Apple Support Community+1

          If it’s a software or settings issue, you can often solve it yourself. But if it’s a hardware or pairing failure, repair or professional help may be required.


          Key Checks Before You Fix — Diagnosis

          Before jumping into steps, do these quick checks. They help you narrow whether the problem is trivial (fixable at home) or serious (needs repair).

          2.1 Check for obvious obstructions

          1. Clean the front camera area gently with a microfiber cloth. Ensure no dust, fingerprints, or smudges.

          2. Examine your case / screen protector — especially if it is thick, rugged, or misaligned. Sometimes the edge of a case blocks the sensor.

          3. Check for physical damage — cracks, dents, or impact near the top of the phone (where the TrueDepth system lives).

          4. Test front camera / FaceTime — open the front camera app and see if it functions normally. If the front camera is broken, Face ID won’t work.

          2.2 Confirm Face ID is enabled in Settings

          • Go to Settings > Face ID & Passcode. Ensure Face ID is set up, and features like “iPhone Unlock,” “iTunes & App Store,” etc., are toggled on. Android Authority+1

          • If “Set Up Face ID” appears disabled (greyed out), that’s a clue of deeper trouble.

          • Also check Accessibility > Face ID & Attention (or in newer iOS versions: Settings > Accessibility) — “Require Attention for Face ID” may interfere if it’s too sensitive. Apple Support

          2.3 Identify error messages

          Watch out for alerts like:

          • “Face ID not available”

          • “Face ID has been disabled”

          • “Unable to activate Face ID”

          • “Camera covered”

          These messages can indicate whether the issue is software or hardware. For example, “Face ID disabled” often points toward a hardware pairing or component failure. Apple Support+2Android Authority+2

          2.4 Think back: when did it stop working?

          • Did it begin after a recent iOS update?

          • Did you ever replace the screen or let a third-party repairer open the phone?

          • Was there any water exposure or drop?

          These clues can guide which fix path to try first.


          Step-by-Step Fixes You Can Try at Home

          Below is a structured workflow — start from the easiest fixes, proceed step by step. After each, test whether Face ID works again. If one doesn’t work, move to the next.


          3.1 Restart your iPhone

          A simple reboot sometimes resolves transient software glitches.

          • Press and hold volume + side button (or power button) until power-off slider appears.

          • Slide to turn off. Wait ~30 seconds, then power on again.

          • Enter your passcode, then try Face ID again.

          Many users report this basic step solves minor issues. Asurion+1


          3.2 Check for iOS updates

          If there’s a software bug in your version, an update might fix it:

          • Settings > General > Software Update

          • If an update is available, install it.

          • After updating, test Face ID again.

          Often, Apple includes Face ID fixes in patch updates. Android Authority+2Apple Support Community+2


          3.3 Reset Face ID and set it up again

          This removes old facial data and starts fresh.

          • Go to Settings > Face ID & Passcode > Reset Face ID

          • Then tap Set Up Face ID and follow the on-screen instructions

          • Move your head in a circle slowly so all angles are captured.

          If the “Reset Face ID” is greyed out or unavailable, that signals a deeper issue.

          Also, you can try adding an alternate appearance if you often look different (glasses, beard change, etc.). help.backmarket.com+2Android Authority+2


          3.4 Reset All Settings

          If resetting Face ID alone doesn’t help, you can reset all device settings (this won’t delete your data, but will reset Wi-Fi, wallpaper, etc.):

          • Settings > General > Transfer or Reset iPhone > Reset > Reset All Settings

          • Enter passcode and confirm

          • Then set up Face ID again after the reset

          This clears out any conflicting settings that may block Face ID.


          3.5 Toggle Face ID features off and on

          Sometimes toggling certain Face ID uses off and back on helps:

          • In Settings > Face ID & Passcode, disable features like “iPhone Unlock,” “iTunes & App Store,” etc.

          • Turn them back on after a few seconds and test.

          You may also disable Face ID for third-party apps and re-enable selectively. Android Authority+1


          3.6 Adjust “Require Attention” / Attention-Aware settings

          If your eyes or facial movement are marginally off, the “Require Attention” feature may reject the scan:

          • Go to Settings > Accessibility > Face ID & Attention

          • Turn Require Attention for Face ID off

          • Also disable Attention Aware Features if needed

          • Try Face ID again

          This makes Face ID a bit more permissive (less strict). Apple Support+1


          3.7 Use Face ID with Mask / Glasses settings (where applicable)

          If your device supports it (iPhone 12 or newer, iOS 15.4+):

          • Under Settings > Face ID & Passcode, find Face ID with a Mask option

          • Enable it, and optionally Add Glasses

          • Rescan your face with mask/glasses so Face ID can adapt

          • Do not try with sunglasses — they block IR. Apple Support+2Android Authority+2


          3.8 Test in good lighting & distance

          Sometimes Face ID fails simply because of poor conditions:

          • Make sure you’re ~10–20 inches (25–50 cm) from the front camera

          • Face the phone squarely

          • Ensure good lighting (not too dark, not direct harsh light)

          • Remove hats, masks (if not configured), sunglasses

          If it works in ideal conditions, that suggests a sensitivity or calibration issue.


          3.9 Final software fallback: backup & restore

          If nothing else works, you can:

          1. Back up your iPhone (via iCloud or through your computer)

          2. Erase All Content & Settings (Settings > General > Transfer or Reset iPhone > Erase All)

          3. Restore from backup

          4. Re-setup Face ID

          This step rules out deep software corruption. But be cautious — always ensure your backup is intact.


          When It’s a Hardware or Pairing Problem — What to Do

          If after all these steps, Face ID still doesn’t work, the root cause is likely hardware or incorrect component pairing. Here’s what to try or expect.

          4.1 Hardware failures in TrueDepth components

          These are common culprits:

          • Flood illuminator failure (the IR light that “illuminates” your face) — often damaged by moisture or dust. ipadrehab.com

          • Dot projector damage (the component projecting thousands of invisible dots)

          • Flex cable damage or disconnection

          • IR camera / sensor module failure

          • Incorrectly paired replacement parts — e.g. from a third-party screen replacement

          • Corrosion from liquid damage or wear over time

          When the hardware is at fault, no amount of software tinkering will fully restore Face ID. In some cases microsoldering or component transplanting is needed — but success depends on whether the original cryptographic pairing can be restored. ipadrehab.com

          4.2 Indicators that it’s hardware / pairing related

          • “Face ID not available” remains greyed out

          • “Unable to activate Face ID” or “Face ID has been disabled” errors

          • The “Reset Face ID” option disappears

          • A recent third-party screen or camera repair occurred

          • The iPhone shows “Parts & Service History — TrueDepth camera” with “Unknown Part” in Settings > General > About

          • Nothing changes after full restore

          4.3 What you can do (or not)

          • Contact a qualified repair shop (ideally one experienced in Face ID component work)

          • Avoid DIY replacement unless you’re skilled in microsoldering and know how to re-pair parts

          • Use Original or Apple-certified parts — counterfeit or mismatched parts often break Face ID permanently

          • Inquire about part re-pairing / micro-soldering — some advanced repair shops can transfer the original Face ID module to a new housing

          • In worst cases, hardware replacement by Apple might be necessary

          If you are in Rawalpindi or the Islamabad area, OwlRepairs offers in-house repair and on-site mobile service. You can request an instant quote right now via our Instant Quote Widget or Contact Us to assess whether your Face ID module can be restored or replaced.


          Preventive Tips & Best Practices

          Once (and if) your Face ID is working again, follow these tips to reduce the chances of issues recurring:

          • Always use a high-quality, properly aligned case/screen protector that doesn’t block the top sensors

          • Avoid exposing the phone to moisture or extreme humidity

          • Clean the front camera area occasionally with a soft microfiber cloth

          • Be cautious about third-party repairs — insist on authorized or experienced shops

          • After any repair, test Face ID thoroughly before resuming use

          • Keep iOS updated — many improvements and bug fixes come via system updates

          • If you wear masks or change your appearance often (glasses, facial hair), use “Alternate Appearance” and Face ID with Mask features

          • Avoid “out-of-the-box” aggressive security settings until Face ID is stable


          Conclusion & Final Thoughts

          Face ID is one of the most convenient and secure features of modern iPhones, but its precision also makes it sensitive to both minor software glitches and serious hardware failures. In this guide, we walked you through:

          1. Understanding how Face ID works.

          2. Diagnosing whether your issue is simple or deep.

          3. Step-by-step home fixes (restart, reset, settings tweaks, restore).

          4. When it’s likely hardware/pairing trouble, and what to do.

          5. Preventive habits to protect it going forward.

          If you’ve tried every step and Face ID still won’t cooperate, it’s very likely a hardware or pairing issue — and you’ll want to consider expert repair rather than further trial and error.

          If you’re in Pakistan and looking for reliable service, OwlRepairs provides mobile repair service (we come to you) — see more at We Come To You – Mobile iPhone/Android Repair. You can also check Sell Your Device or Buy a Device if considering replacement.

          If you like, I can also prepare a shorter version optimized for SEO, or a checklist infograph you can embed. Do you want me to prepare that next?


          FAQs

          Q1: Why does Face ID sometimes “fail” randomly even though it worked before?
          A1: Intermittent failures often stem from software hiccups, misalignment of your face, or slight obstruction (case, smudge). That’s why the first steps are always restart, reset, and cleaning. If the problem becomes permanent, hardware is likely to blame.

          Q2: Does replacing the screen damage Face ID?
          A2: It can — if the repair shop doesn’t preserve or re-pair the original TrueDepth module correctly, Face ID may be permanently disabled. That’s why proper repair technique and pairing are essential. ipadrehab.com+1

          Q3: Is my data at risk if Face ID fails?
          A3: No — Face ID is just a convenience unlocking method. If it fails, you can still access your phone with passcode. The cryptographic security of your OS and data is unaffected.

          Disclaimer
          This guide is for informational purposes only. While I strive for accuracy, no blog post can replace professional diagnosis. If your iPhone shows hardware or pairing issues, seek a certified repair expert rather than attempting risky repairs yourself.

          Your Guide to Choosing the Right Phone Repair Shop: Avoiding Scams and Ensuring a Quality Fix

          By Blog No Comments
          A friendly Owl Repairs technician in a blue polo shirt shows a repaired smartphone to a smiling female customer at a clean, modern repair counter. The screen of the phone is glowing light blue, indicating it's working perfectly. The background shows shelves of phones and the Owl Repairs logo. Tools and a tablet displaying "INSTANT WIDGET" are also on the counter.

          A cracked screen, a dying battery, or a malfunctioning charging port can feel like a disaster. In today’s hyper-connected world, our phones are not just devices; they’re our lifelines for work, family, and information. But when disaster strikes, how do you find a repair shop you can trust? The market is filled with options, from mall kiosks to big-box stores, and navigating them can be a minefield of potential scams, low-quality parts, and hidden costs.

          As a team of experienced and certified mobile device repair technicians at Owl Repairs, we’ve seen it all—from devices botched by inexperienced hands to customers who were overcharged for a simple fix. We understand the stress and uncertainty that comes with entrusting your personal device to a stranger. This guide is built on our collective decades of experience and is designed to equip you with the knowledge to make an informed decision and ensure a safe, successful repair.

          This content is for informational purposes only and aims to provide expert guidance on a topic with significant financial implications. It is not an endorsement of any specific third-party service provider, but a framework for evaluating them.


          The High Stakes of Phone Repair – Why Trust Matters

          When your phone breaks, you’re not just worried about a piece of glass or a battery. You’re worried about your photos, your contacts, your financial apps, and your privacy. This makes phone repair a clear “Your Money or Your Life” (YMYL) topic. A bad repair can lead to more than just a broken phone; it can lead to data loss, future device malfunctions, and even security risks if your data is mishandled.

          The mobile phone repair industry is largely unregulated, which means anyone can open a shop and call themselves an “expert.” According to a report from the FTC, a significant portion of consumer complaints related to electronics repairs concern issues like unauthorized repairs, use of non-genuine parts, and failure to honor warranties. It’s crucial to understand these risks before you hand over your device. A good repair shop prioritizes data privacy and uses high-quality parts to ensure your phone’s longevity and performance.


          Key Indicators of a Reputable Repair Shop

          Knowing what to look for can save you from a lot of headaches and potential financial loss. Here are the key factors you should evaluate when choosing a repair service.

          Certifications and Expertise

          A reliable repair shop will have technicians with verifiable certifications. Look for certifications from reputable organizations or manufacturers. For example, some shops may have Apple-Certified Technicians or be part of programs like the Apple Independent Repair Provider program. These certifications signal that technicians have undergone rigorous training and have access to official repair manuals and diagnostic tools. At Owl Repairs, our team is trained on the latest repair techniques for a wide range of devices, including iPhones and Androids, ensuring we’re equipped to handle even the most complex issues.

          Transparency and Genuine Parts

          One of the biggest red flags is a lack of transparency about parts. High-quality, genuine parts are essential for a lasting repair. A reputable shop will be upfront about where their parts come from. Ask them directly: “Do you use OEM (Original Equipment Manufacturer) parts, or high-quality aftermarket parts?” They should be able to explain the difference and the pros and cons of each. Be wary of shops that offer suspiciously low prices, as this often indicates the use of cheap, low-quality components that can cause issues down the line. Our technicians use only the highest-quality parts to ensure every repair meets our strict standards.

          Warranty and Guarantee

          A good repair shop stands by its work. They should offer a comprehensive warranty on both the parts they use and the labor they perform. A warranty provides you with peace of mind, knowing that if the same issue reappears within a reasonable timeframe (typically 90 days to one year), the repair will be covered. Always read the fine print of the warranty to understand what is covered and what is not. This is a crucial element of a trustworthy service provider.


          Practical Steps to Take Before Your Repair

          Now that you know what to look for, here’s a step-by-step guide to ensure a smooth and secure repair process.

          1. Get an Instant Quote. Before you go to a shop, get an estimate. A professional service will offer a quick and easy way to get a transparent price for your repair. Check out our instant quote widget to see how simple this process can be.
          2. Check Online Reviews and Reputation. Do your research. Look at customer reviews on Google, Yelp, and other platforms. Pay attention to the number of reviews, the overall rating, and the specific comments people make about the quality of service, turnaround time, and communication. A high volume of positive, detailed reviews is a good sign.
          3. Backup Your Data. This is the most critical step. Data loss is a real risk with any repair, especially for complex issues. Before you hand over your phone, back up all your photos, contacts, and important files to a cloud service (like Google Drive or iCloud) or a computer. This protects you from permanent data loss. If a repair shop advises against this, or tells you it’s not necessary, consider it a major red flag.
          4. Communicate Your Concerns. When you’re at the shop, don’t be afraid to ask questions. A good technician will be happy to explain the repair process, the parts they’ll be using, and how they’ll handle your device. For more complex problems, like water damage or motherboard issues, you can contact us directly to discuss your options.

          What to Do After the Repair

          The process isn’t over when you get your phone back.

          1. Test Your Device Thoroughly. Don’t leave the shop without testing all of your phone’s functions. Check the screen responsiveness, the camera, the charging port, the speaker, and any other functions that were related to the repair.
          2. Ask for a Receipt and Warranty Information. A professional shop will provide a detailed receipt that includes the parts used, the service performed, the cost, and the terms of the warranty. Keep this in a safe place.
          3. Leave an Honest Review. If you had a great experience, share it! Your positive review can help others find a trustworthy service. If your experience was less than satisfactory, a constructive review can help the business improve and warn other potential customers.

          Conclusion and Final Thoughts

          Choosing a phone repair shop is a decision that requires careful consideration. Your device holds a significant part of your life, and entrusting it to a professional ensures both a quality fix and the security of your personal data. By focusing on shops with proven expertise, transparent practices, and strong customer guarantees, you can protect yourself from subpar repairs and a frustrating experience.

          Whether you need a quick screen replacement, are looking to sell your old device, or want to buy a refurbished one, we believe in providing a service built on trust and expertise. Remember, we also offer a convenient mobile repair service where we come to you, so you never have to worry about leaving your home or office.

          For more helpful guides and insights on device repair and maintenance, be sure to check out our blog.


          FAQs

          Q1: Is it always cheaper to get a third-party repair than going to the manufacturer? A1: While a third-party repair is often more affordable, it’s not always the best option. Official repair centers may use genuine parts and their work might be covered under your device’s original warranty or an extended warranty program like AppleCare. However, a reputable third-party repair shop can provide a quality repair at a more competitive price, especially for older models.

          Q2: How can I tell if a repair shop is using fake parts? A2: It can be difficult to tell just by looking, but there are signs. For screens, look for differences in color vibrancy, touch sensitivity, or a poorer fit. For batteries, check if the battery life is significantly worse than before the repair. Always ask for a warranty, as it provides a safety net against these issues.

          Disclaimer

          The information provided in this post is for educational and informational purposes only and is not intended as professional advice. While our team is composed of experienced professionals, this content should not be used as a substitute for professional consultation. We recommend you always perform your own due diligence and consult with a certified professional before making any decisions regarding the repair of your personal electronic devices.

          How to Fix iPhone “SOS Only” / “No Service” (Step-by-Step) | Owl Repairs

          By Blog No Comments

          phone repair marietta

          Written by Scott Vo

          Imagine pulling out your iPhone only to see “SOS Only” or “No Service” in the top corner of your screen. Suddenly, you can’t make calls, send texts, or use mobile data — except for emergency calls. For many users, this feels alarming and inconvenient, especially when you rely on your iPhone for work, maps, or daily communication.

          At Owl Repairs, we regularly help customers fix iPhones stuck in SOS mode or without service. In this step-by-step guide, we’ll explain why this happens, what you can do at home, and when it’s time to seek professional repair.


          What Does “SOS Only” / “No Service” Mean?


              • SOS Only: This means your iPhone can only connect to emergency services. You won’t have access to calls, texts, or internet data.

              • No Service: Your iPhone cannot connect to any carrier network, leaving it completely offline.

            Both alerts are signs that your device is struggling to connect to a cellular network — either due to settings, SIM card issues, or hardware problems.


            Causes of iPhone “SOS Only” / “No Service”

            1. Carrier Issues

            Sometimes, the problem isn’t your iPhone at all. Temporary outages or maintenance from your carrier can trigger this warning.

            2. SIM Card Problems

            A damaged, misplaced, or outdated SIM card may prevent your iPhone from connecting to the network.

            3. Network Settings Errors

            If network settings are corrupted, your iPhone may fail to detect your carrier.

            4. Software Bugs or Outdated iOS

            Running older iOS versions or having glitches in the operating system can disrupt connectivity.

            5. Hardware Damage

            Water damage, logic board issues, or antenna failures may also lead to “SOS Only” or “No Service.”


            Step-by-Step Fixes You Can Try

            Step 1: Check Carrier Coverage

            Make sure you’re in an area with network coverage. Weak signals or being underground may cause the error.

            Step 2: Restart Your iPhone

            A simple restart often resolves temporary glitches. Hold the side button, slide to power off, wait a few seconds, then turn it back on.

            Step 3: Toggle Airplane Mode


                • Swipe into Control Center

                • Turn Airplane Mode ON, wait 10 seconds, then turn it back OFF

              This resets your iPhone’s connection to nearby towers.

              Step 4: Remove and Reinsert SIM Card


                  • Power off your iPhone

                  • Use a SIM ejector tool to remove the SIM

                  • Inspect for damage or dust

                  • Reinsert carefully and restart

                If the SIM is faulty, you may need a replacement from your carrier.

                Step 5: Reset Network Settings


                    • Go to Settings > General > Transfer or Reset iPhone > Reset > Reset Network Settings

                    • Enter passcode and confirm

                  This erases saved Wi-Fi and carrier settings but often fixes connectivity errors.

                  Step 6: Update iOS


                      • Go to Settings > General > Software Update

                      • Install the latest version of iOS to patch any bugs

                    Step 7: Try Another SIM or eSIM

                    If possible, test your iPhone with another SIM card to see if the problem persists.


                    When DIY Fixes Don’t Work

                    If you’ve tried all the above and your iPhone still shows “SOS Only” or “No Service,” it’s likely a hardware issue. At this stage, you’ll need a professional repair service like Owl Repairs.


                    Professional Repair Options at Owl Repairs

                    At Owl Repairs, our technicians can diagnose the exact cause and offer:


                        • SIM Tray Replacement – if your tray is damaged or not holding the SIM correctly

                        • Antenna Repair – fixing broken connections that affect signal

                        • Logic Board Repair – advanced microsoldering for water or hardware damage

                        • Full Diagnostics – identifying whether the issue is with the SIM, carrier, or internal hardware

                      You can check costs instantly with our Instant Quote Tool.

                      If your iPhone is outdated or not worth repairing, you also have the option to Sell Your Device or buy a replacement from Buy a Device.


                      Prevention Tips


                          • Keep iOS updated to prevent software-related issues.

                          • Handle SIM cards carefully when inserting or removing.

                          • Avoid moisture damage by keeping your iPhone in a case if exposed to water or humidity.

                          • Don’t ignore early signals — weak signals, frequent dropouts, or random restarts may be warning signs.

                        And if you’re too busy to visit us, we offer We Come To You Repairs for on-site service.


                        Conclusion

                        iPhone showing “SOS Only” or “No Service” doesn’t mean your device is permanently broken. Most issues can be solved with simple DIY fixes, while hardware-related problems are best left to certified technicians.

                        At Owl Repairs, we offer fast, reliable solutions to get your iPhone back online. Whether you need diagnostics, SIM tray repair, or advanced board repair, we’ve got you covered. Start now with our Instant Quote Tool or reach us via the Contact Page.

                        For more helpful tips, explore our Repair Blogs.


                        FAQs

                        Q1: Why does my iPhone randomly show SOS Only?
                        This often happens due to weak signals, carrier issues, or SIM card problems.

                        Q2: Can software updates fix “No Service”?
                        Yes, updating iOS can resolve bugs causing connectivity errors.

                        Q3: Does replacing the SIM always fix it?
                        Not always. If hardware like the antenna is damaged, professional repair is needed.

                        Q4: How much does it cost to fix “SOS Only”?
                        Costs vary depending on whether it’s a SIM issue, antenna problem, or board-level repair. Use our Instant Quote Tool for an estimate.


                        Disclaimer

                        This blog is for educational purposes only. For accurate troubleshooting and safe repairs, consult professionals like those at Owl Repairs.

                        Liquid Detected in Lightning Connector: Causes & Repair Options | Owl Repairs

                        By Blog No Comments

                        Written by Scott Vo

                        iPhone showing a ‘Liquid Detected in Lightning Connector’ warning with water droplets around the charging port. Text highlights causes and repair options with Owl Repairs branding.

                        Seeing the “Liquid Detected in Lightning Connector” warning pop up on your iPhone can be stressful. It usually happens when your device detects water or moisture inside the charging port. This built-in Apple feature is meant to protect your iPhone from short circuits and permanent damage.

                        At Owl Repairs, we handle water damage and charging issues every day. Our expert technicians understand why this error appears, what it means for your device, and how to safely repair it before it gets worse.


                        What Does “Liquid Detected in Lightning Connector” Mean?

                        This warning shows up when your iPhone senses liquid in or around the Lightning charging port. Instead of allowing you to charge, the phone disables charging temporarily to prevent damage to the connectors, battery, and logic board.

                        It doesn’t always mean your phone is ruined, but it does mean you should take action immediately.


                        Common Causes of the Warning

                        1. Direct Water Contact

                        Accidentally dropping your iPhone in water, spilling a drink, or using it in the rain may trigger the alert.

                        2. High Humidity

                        Using your iPhone in a sauna, bathroom, or humid environment can cause moisture build-up in the charging port.

                        3. Sweat Exposure

                        Keeping your phone in a pocket during workouts can lead to sweat entering the Lightning connector.

                        4. Faulty or Wet Cable

                        Sometimes the issue isn’t the port itself but a charging cable that’s wet or damaged.

                        5. Internal Damage from Previous Spills

                        Even after drying, residue or corrosion inside the port may keep triggering the warning.


                        What NOT to Do When This Warning Appears

                        • Don’t force charging. Forcing power through moisture can fry your iPhone’s components.
                        • Don’t stick cotton swabs or tissues inside. This pushes water further inside.
                        • Don’t use a hair dryer or heat gun. Excess heat can warp the port and damage seals.


                        Safe DIY Steps to Try

                        1. Disconnect immediately – unplug the charging cable and remove any accessories.
                        2. Dry the iPhone naturally – place it upright in a dry, cool space.
                        3. Wait several hours – allow moisture to evaporate before reconnecting.
                        4. Use wireless charging if you need power urgently, as it bypasses the Lightning port.

                        If the warning persists, it’s time for a professional inspection.


                        Professional Repair Options

                        At Owl Repairs, we offer multiple solutions depending on the extent of the damage:

                        • Port Cleaning: Removing moisture, dust, or residue inside the connector.
                        • Port Replacement: If corrosion is advanced, a Lightning port replacement restores proper function.
                        • Water Damage Repair: If liquid spread beyond the port, our technicians perform full diagnostics and board-level repairs.

                        You can quickly check the estimated cost using our Instant Quote Tool.


                        Prevention Tips

                        • Use a waterproof case if you’re near pools, beaches, or rain.
                        • Avoid charging in humid environments like bathrooms after a shower.
                        • Keep cables dry and replace frayed or damaged ones.
                        • Don’t ignore small spills. Even tiny droplets can corrode over time.

                        If you’ve had recurring issues, consider upgrading by trading in your old device through Sell Your Device or getting a certified replacement from Buy a Device.


                        Why Choose Owl Repairs?

                        • Expert technicians with years of experience
                        • Lifetime warranty on most parts (excluding water/physical damage)
                        • Affordable pricing with upfront quotes
                        • Mobile service through our We Come To You option
                        • Convenient booking via our Contact Page

                        Explore more repair tips on our Owl Repairs Blog.


                        Conclusion

                        The “Liquid Detected in Lightning Connector” alert is your iPhone’s way of protecting itself. While minor cases may dry out on their own, persistent warnings or charging failures require expert help.

                        At Owl Repairs, we provide professional diagnostics and safe repairs to get your iPhone working again without risking long-term damage. Visit us today or book your repair online.


                        FAQs

                        Q1: Can I charge my iPhone wirelessly if I see this warning?
                        Yes, wireless charging is safe because it doesn’t use the Lightning port.

                        Q2: How long does it take for the port to dry?
                        It can take a few hours to a full day depending on the amount of liquid.

                        Q3: Will the alert go away automatically?
                        Yes, once the port is dry. If it keeps reappearing, professional cleaning is needed.

                        Q4: Can corrosion spread inside the phone?
                        Yes, untreated liquid damage may spread to the logic board. Early repair is recommended.


                        Disclaimer

                        This blog is for informational purposes only. For accurate diagnosis and repair, consult professional technicians like those at Owl Repairs.

                        Call Now Button